I like to take pictures of my projects in progress. Sometimes I use a digital camera, but more often I just use my iPhone. The iPhone is lower quality images but they usually good enough, and since it’s always in my pocket I get a lot more images as I go along. Here’s most of the pictures I took on my workbench project. If you want better pictures of the final product or talk about the design, I recommend my main workbench post.
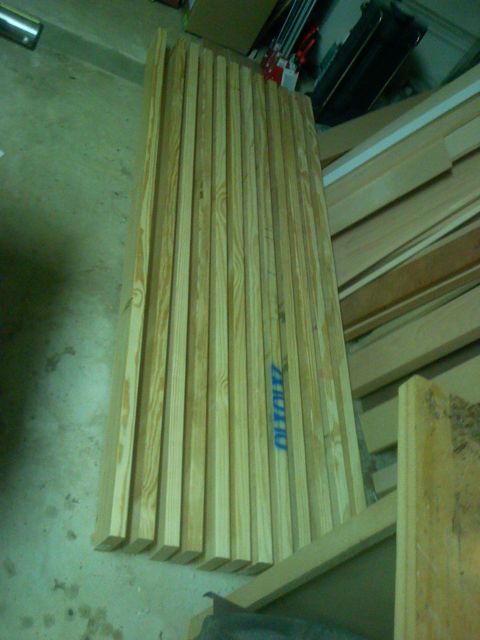
The bench top materials. I started with 2×10 boards 10′ long from Home Depot. I cut them to 6.5 feet and ripped them. I set them up in the shop to acclimate and dry out a bit more and let them for several weeks. These actually started out rather dry, but I used the moisture meter to confirm this. Getting dry wood is never a guarantee with wood from the home stores – it’s probably not kiln-dried and stored with as much care as the more expensive hardwoods.
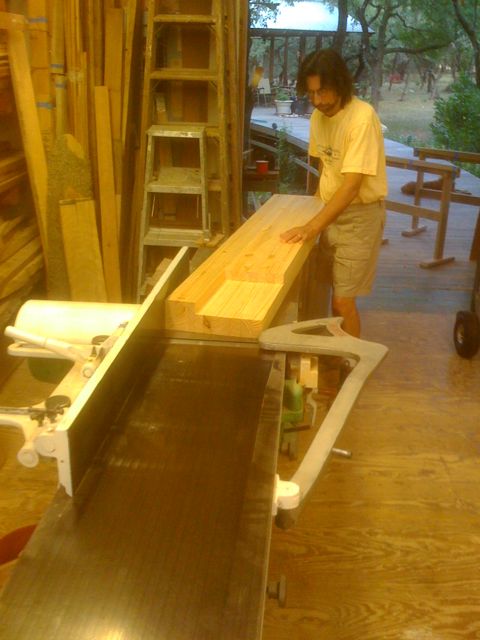
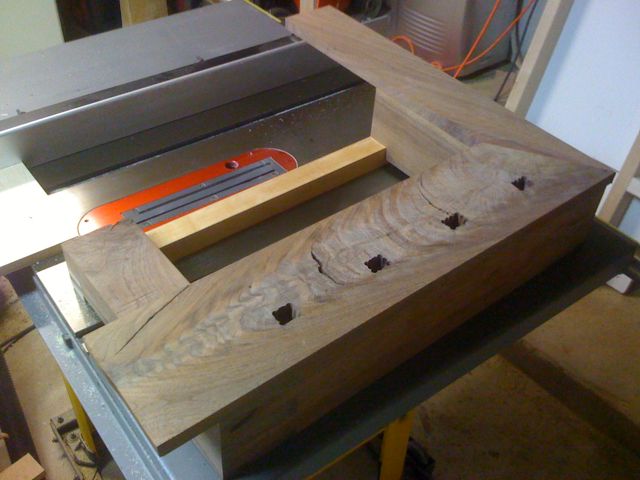
After drying and jointed these, I ended up with about 1 3/8″ of usable width from each board, but a few did twist and I only got 1″ (out of the original 1 3/4″). These got glued up into groups of 3, I was concerned about having enough clamping pressure if I glued too many layers together. After letting these groups dry for a few weeks, I jointed them again (now about 4″x4″ posts). The part of the bench where the tail vise goes is expected to the 2.5″ thick, so I cut those notches on the bandsaw and glued up sections for most of the top. At this point, I had a 13″ wide top, which is much bigger than my jointer can handle. A common way to flatten the top is with a handplane, but my handplane skills are still pretty suspect. Fortunatly, I have a friend (furnituremaker Michael Colca, in the picture) with a 16″ jointer.
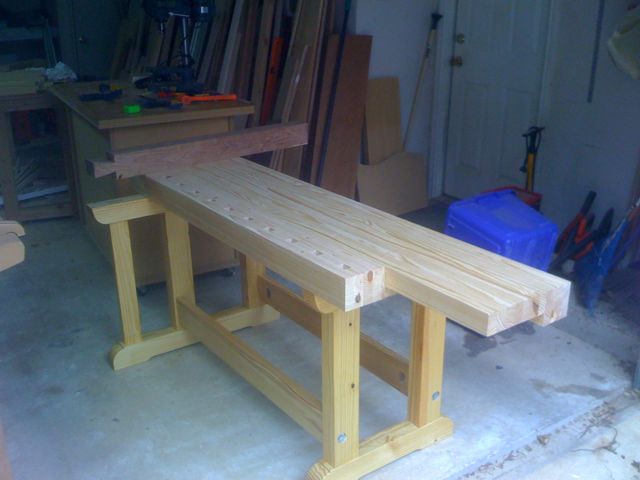
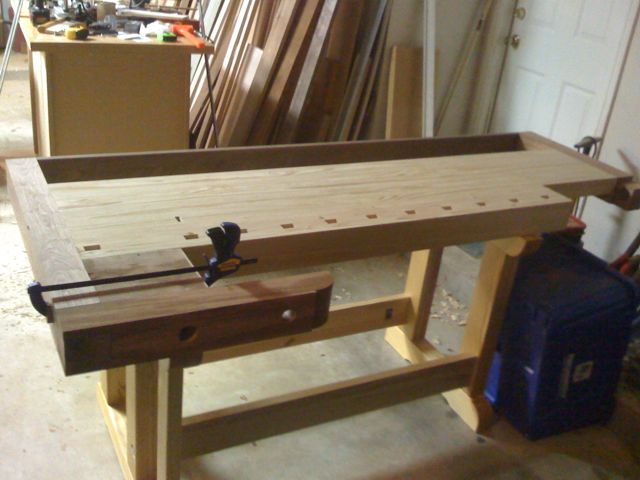
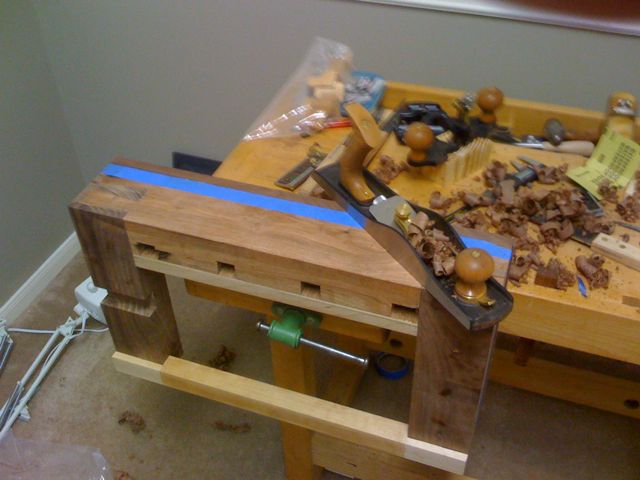
The last picture was taken a lot later in the project, you’ll notice the front section isn’t attached in some of the other pictures in this post. The final step is to glue the front sections onto the rest of the bench. After this was done, I did use a handplane to flatten the bench, but with all of the intermediate flattening on the jointers, there was very little work to do by hand.
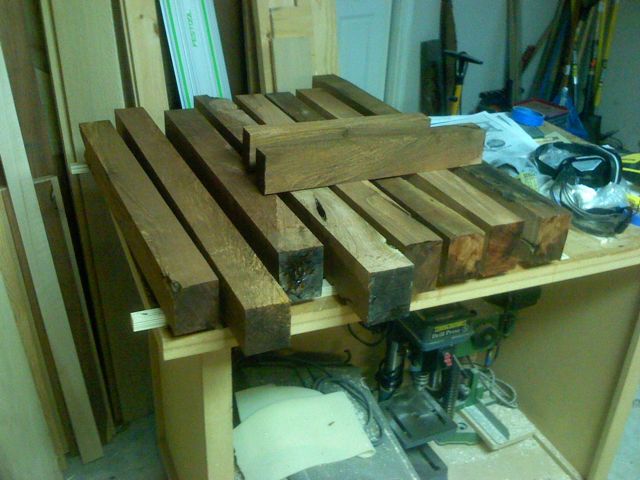
This is some of the mesquite that I used for the bench. I was salvaging these from a woodpile that had been sitting outside for a long time. It had several bad sections that I could tear out with my hand. My original idea was to use this for the legs, and this was a rough cut of all of the leg parts, and was only about half of the wood from the original boards. After letting these sit, I found that half of these boards were too bad to work with, and couldn’t count on the base being stable. The good parts from these boards made the front vise arm and one of the end caps.
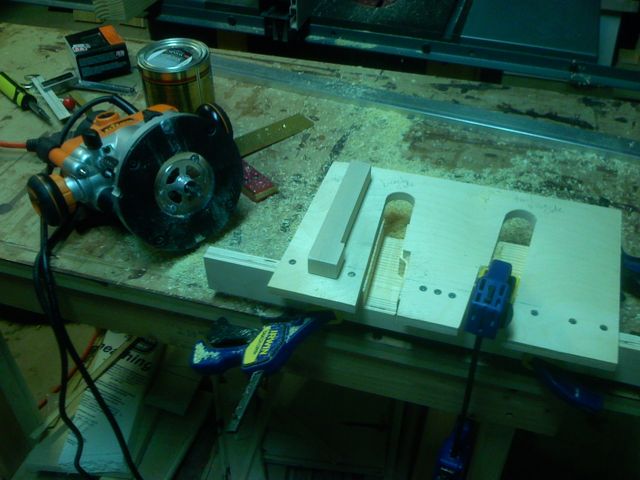
This is a test block for the dog holes that go into the front of the bench. The bench dog (sitting on top of it) drops down into the holes, and sticks up in order to hold flat work against the bench. I wanted a shoulder in the hole, in order to prevent the bench dog from falling all of the way through the dog hole. So I used a router jig to make these holes. The left side of the router jig is for the holes in the benchtop, the right side is for the holes in the tail vise. The main difference is a 2 degree lean to the hole. This lean helps pull the work to the bench as it’s being tightened between the bench dogs.
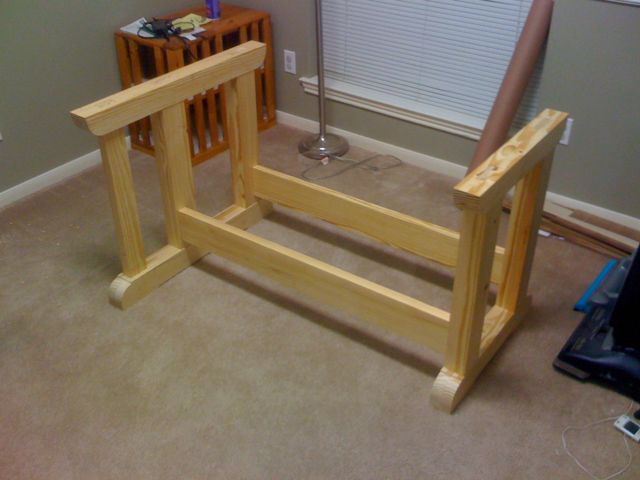
This is a dry fit of the base. It’s a lot of mortise and tenon joinery, and a lot of fitting to make it tight.
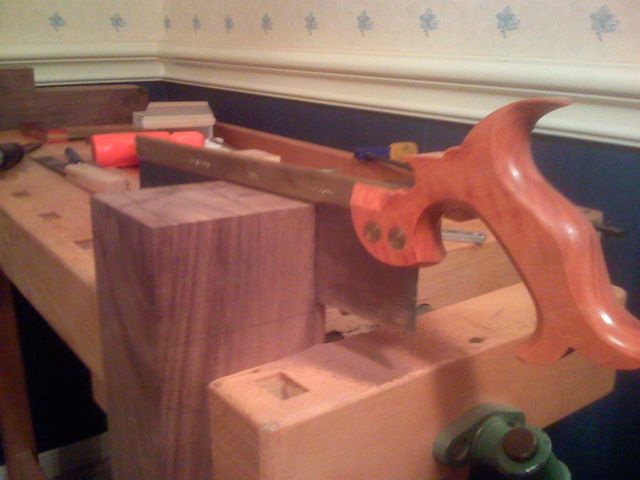
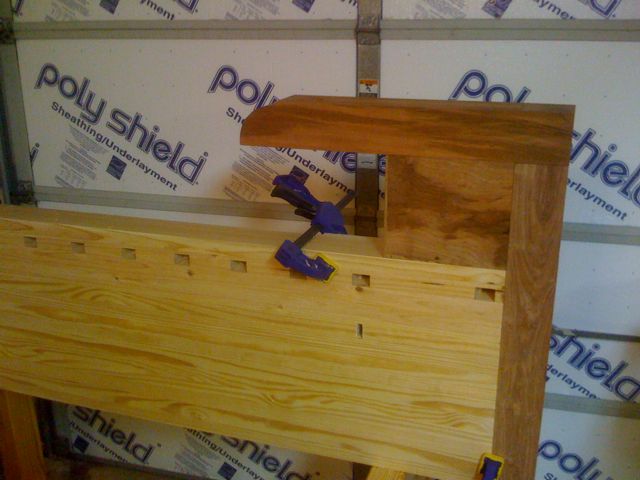
This was the start of the dovetails for my tail vise. I have a Lie-Nielsen tenon saw, and this was taken at the point when I realized that it didn’t quite go deep enough before I was riding against the brass back. I had to finish these cuts with a japanese style rip saw, which is the only handsaw I had without a back.
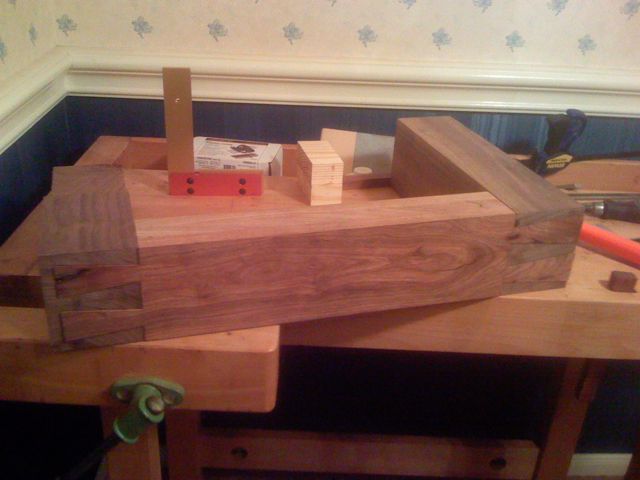
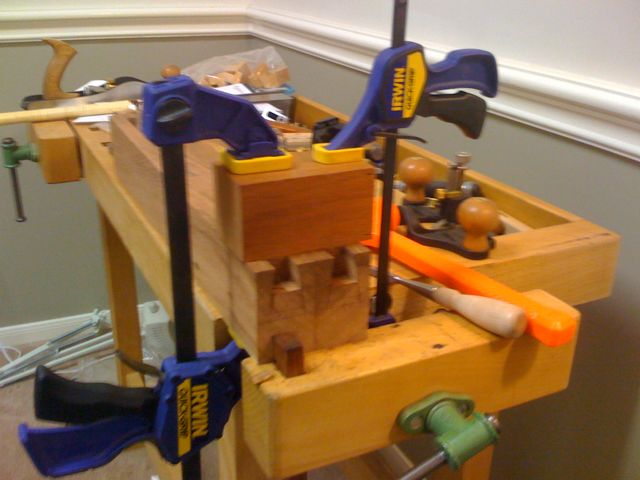
Here’s the 3 pieces being dry fit. The picture above shows me sawing the through dovetail on the right; the left side is a half-blind dovetail which is more difficult to do because the saw only cuts about half of the sides and the rest has to be done with chisels. Cutting and carefully fitting both dovetails took the better part of a weekend.

This is a dry fit of the tail vise against the end cap and the front. Everything has to line up correctly or the vise won’t move. I’m glad I did this, because I found an incorrect measurement in the plans (as far as I can tell, maybe I had something else wrong). The sides were 4 1/4″ tall, as far as I can tell they needed to be 4″. There’s a 7/8″ thick board added to the top of the tail vise, my only solution at this point was to change that to 5/8″.
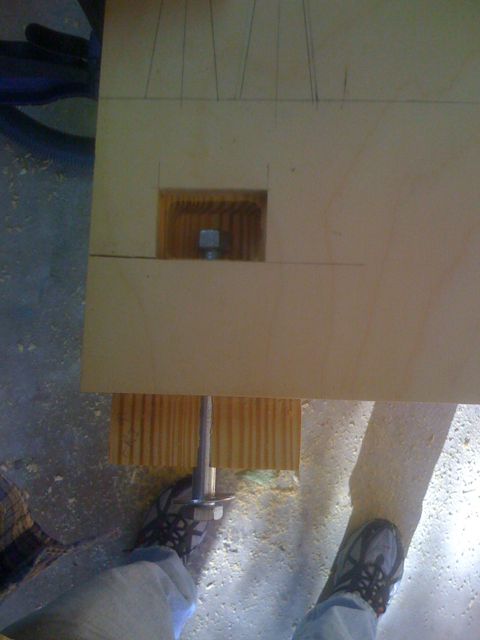
Getting back to the workbench base. I had done all of the mortise and tenon joinery before, but now I had to install the bolt hardware into the long stretchers. In each of the legs, I had to drill a 1/2″ hole from the bottom of the mortise to the outside of the leg (and countersink the bolt with 1 1/2″ bit). Then I assembled the leg and stretcher and drilled back through the hole into the end of the stretcher. You can see how the bolt hole splits the tenon in the picture above. Finally I had to route a mortise so a washer and nut can be put on the end of the bolt. I used a simple rectangular cutout pictured above and a spiral cut bit (without the bolt in the way, of course).
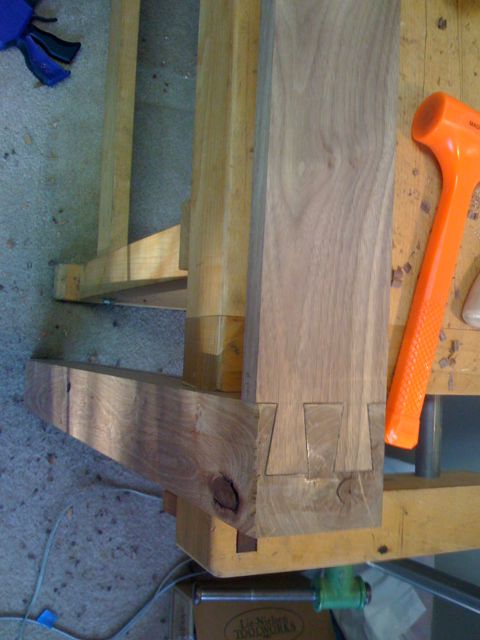
Another big dovetail to do. This one I did on the bandsaw and tilted the table – it didn’t turn out as well as the hand-cut ones. It still took a lot of fitting to get it right. One thing I noticed here is that the front vise arm of the new bench is bigger than my old bench.
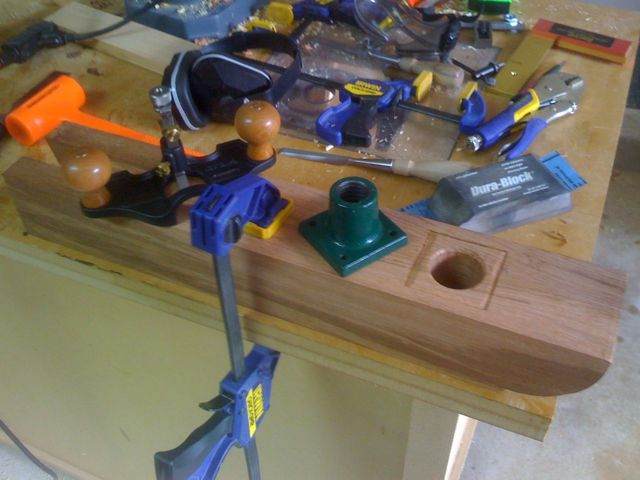
The front arm needs a large nut installed for the vise. The first step is to drill a 1 3/4″ hole deep enough for the nut, then 1 1/4″ the rest of the way through. Putting the large hole all the way through wouldn’t look right. After that, I marked and cut a mortise about 3/8″ deep for the square flange on the nut. I used just a 1/2″ chisel and my router plane to do this. Another way to do this would have been use a router to chew out most of the waste and follow up with a chisel to the edges. Both would work, but I had a new router plane to play with.
This is one of the dry-fits I did along the way. For fitting the front vise (and the tail vise also), I found it helpful to turn the benchtop upright so I didn’t have to fight gravity as much with the heavy pieces. The Klausz article show the fitting upside-down on a large assembly table, but I don’t have any tables big enough to hold the benchtop for fitting.
After all of the vises are fitted, I can finally measure and cut the end caps to the correct length. Then comes 2 more sets of half-blind dovetails, one at each end of the back of the tool tray. The end caps actually bolt into the bench, I didn’t bolt these on with full tension before measuring the tool tray back, so I had to trim the back piece after I had already put the dovetails into it.

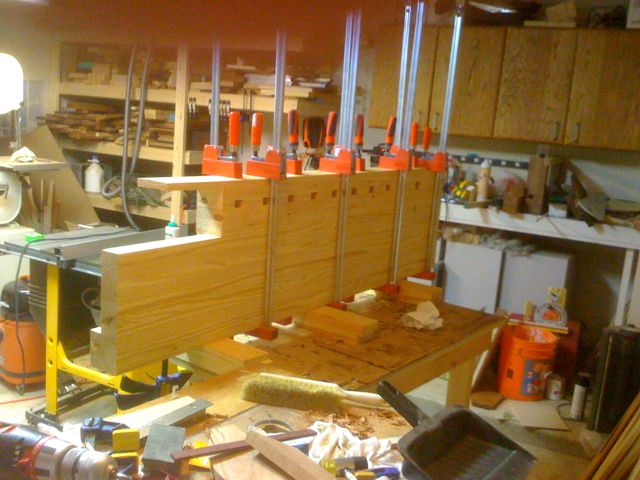
This is the 3 main components of the front vise arm being glued up. This part gets bolted on to rest of the bench through a bolt on the side and a long threaded rod that goes from the front arm to the back of the bench.


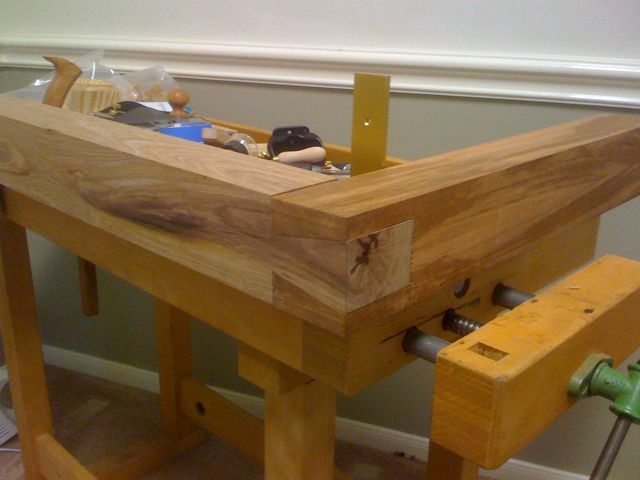
Back to the tail vise. The first picture in this set is yet another dry fitting, but this is the first one that involved the threaded screw and nut. Having that work is a big relief and made all of the other fitting I did worth it.
Now it’s time to install the top plates onto the tail vise. The front part overhangs the inside and covers up the area with the screw. I lined the inside edges up perfectly, and let it overhang the outside, which I planed off later. Once I got the top plates fitted and mitered, I marked the locations of the dog holes and drilled a rough hole through. After glue-up, I used some floats and files to clean up the holes.
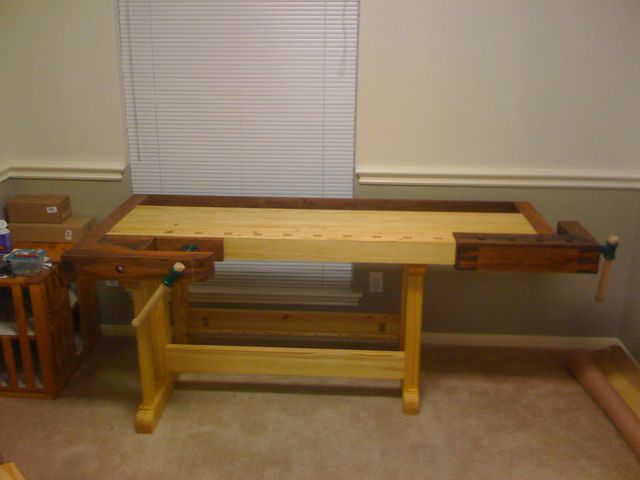
Last picture from my iPhone. The bench has been finished with one coat of Tried and True varnish/oil, brought inside, and assembled. Better pictures are available in my main workbench post.